Introduction to ListView in Flutter: A Beginner’s Guide
The ListView widget in Flutter is one of the most commonly used widgets for displaying a scrollable list of items. It’s a powerful tool for creating dynamic and static lists, allowing developers to manage and present data efficiently.
This guide will walk you through the basics of ListView, its types, properties, and practical examples to help you get started.
1. What is ListView?
ListView is a scrollable widget that arranges its children in a linear direction, either vertically or horizontally. It is perfect for use cases like:
Displaying messages in a chat application.
Creating menus or settings screens.
Presenting lists of data dynamically (e.g., fetched from a database or API).
2. Types of ListView
Flutter provides four constructors to create a ListView, each catering to specific use cases.
a. ListView() (Default)
A straightforward way to create a simple, scrollable list.
ListView(
  children: [
    ListTile(
      title: Text('Item 1'),
    ),
    ListTile(
      title: Text('Item 2'),
    ),
    ListTile(
      title: Text('Item 3'),
    ),
  ],
);
b. ListView.builder()
Efficient for large datasets because it lazily builds list items as they scroll into view.
ListView.builder(
  itemCount: 50, // Total number of items
  itemBuilder: (context, index) {
    return ListTile(
      leading: Icon(Icons.star),
      title: Text('Item $index'),
    );
  },
);
c. ListView.separated()
Adds a separator (like a line or space) between list items.
ListView.separated(
  itemCount: 20, // Total items
  separatorBuilder: (context, index) => Divider(), // Separator widget
  itemBuilder: (context, index) {
    return ListTile(
      title: Text('Item $index'),
    );
  },
);
d. ListView.custom()
Provides advanced customization by using a SliverChildDelegate for rendering children.
ListView.custom(
  childrenDelegate: SliverChildBuilderDelegate(
    (context, index) {
      return ListTile(
        title: Text('Custom Item $index'),
      );
    },
    childCount: 15, // Number of items
  ),
);
3. Common Properties of ListView
Here are some key properties you’ll frequently use when working with ListView:
scrollDirection:- Changes the scrolling direction.
- Default is vertical (
Axis.vertical). - Can be set to horizontal (
Axis.horizontal).
padding:- Adds space around the edges of the list.
- Accepts
EdgeInsetsto define padding values.
shrinkWrap:- Adjusts the size of the list to fit its content.
- Useful when embedding
ListViewinside another scrollable widget.
physics:
Example with Common Properties:
ListView.builder(
  itemCount: 10,
  padding: EdgeInsets.all(8), // Adds padding around the list
  physics: BouncingScrollPhysics(), // Adds bounce effect during scrolling
  scrollDirection: Axis.horizontal, // Scrolls horizontally
  itemBuilder: (context, index) {
    return Container(
      width: 150, // Width for horizontal scrolling
      margin: EdgeInsets.all(8),
      color: Colors.blue,
      alignment: Alignment.center,
      child: Text('Item $index', style: TextStyle(color: Colors.white)),
    );
  },
);
4. When to Use ListView
Here are common scenarios where you should use ListView:
- Static Data:
- Use when the list content is fixed and rarely changes.
- Dynamic Data:
- Use when the list needs to be populated programmatically or updated dynamically.
- Infinite Scrolling:
- Use when items need to be loaded lazily as the user scrolls.
- Intermixed Widgets:
- Use when you need a list combined with other widgets in the UI.
5. Advanced Tips
- Use
ListView.builderfor Performance:
Avoid using the defaultListViewfor large datasets, as it creates all items at once. Instead, useListView.builderfor better memory and performance management. - Customize Items with Widgets:
You can wrap items in custom widgets likeCard,Container, orInkWellto enhance their appearance and interactivity. - Combine with Other Widgets:
Embed aListViewinside aColumnusingExpandedorFlexibleto manage layouts efficiently.
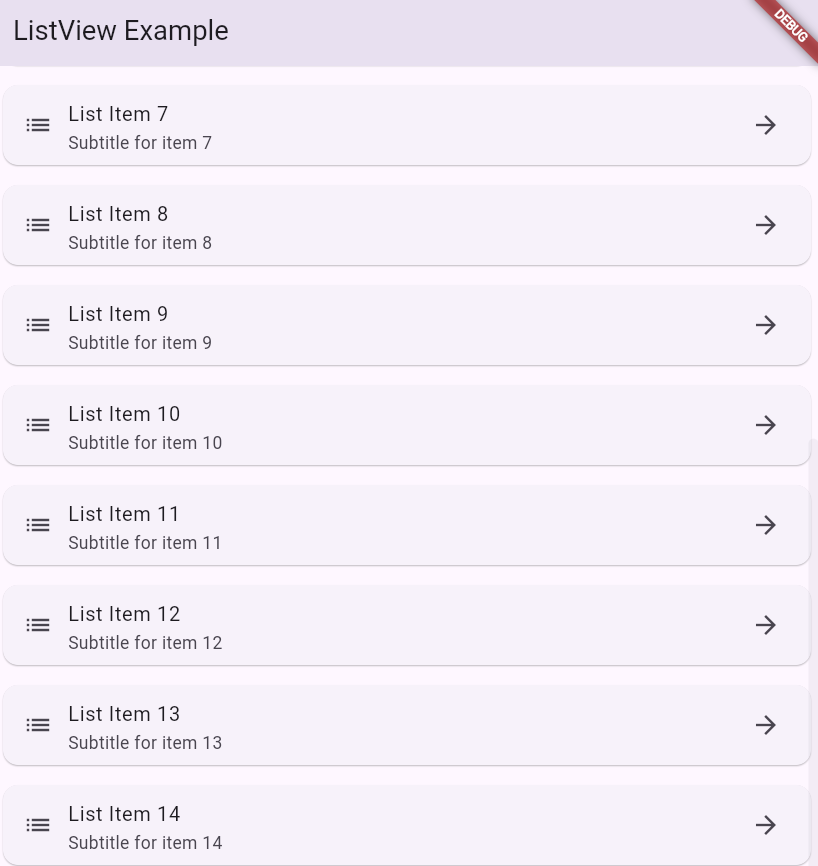
6. Example App: Simple ListView Implementation
Here’s a complete Flutter app demonstrating a ListView.builder:
import 'package:flutter/material.dart';

void main() => runApp(MyApp());

class MyApp extends StatelessWidget {
  @override
  Widget build(BuildContext context) {
    return MaterialApp(
      home: Scaffold(
        appBar: AppBar(title: Text('ListView Example')),
        body: ListView.builder(
          itemCount: 15,
          itemBuilder: (context, index) {
            return Card(
              margin: EdgeInsets.all(8),
              child: ListTile(
                leading: Icon(Icons.list),
                title: Text('List Item $index'),
                subtitle: Text('Subtitle for item $index'),
                trailing: Icon(Icons.arrow_forward),
              ),
            );
          },
        ),
      ),
    );
  }
}
Output:
